

Just like UX designers use Components in Figma or Symbols in Sketch, or developers use React components, content designers can use Frontitude’s copy components feature to create a library of approved content and easily reuse it across their product.
You can create a copy component from any text uploaded to Frontitude. Here are the available methods:
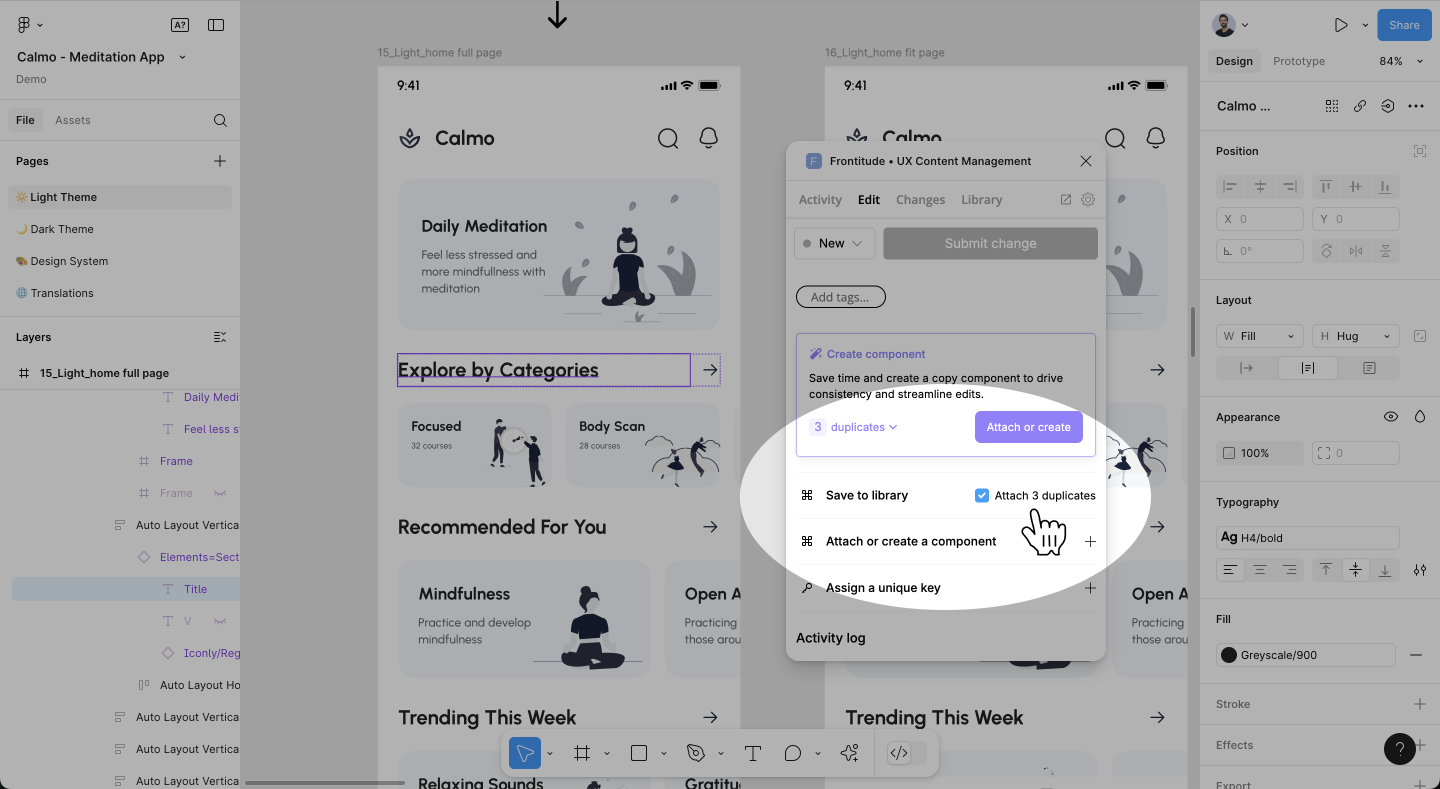
Using the “Save to library” button
The easiest way to create a copy component is by clicking the “Save to library” button, available in both the Frontitude web app and the Figma plugin.
From a Single Text
To convert a single text (with or without duplicates) into a copy component:
- In the web app, use the Edit panel.
- In the Figma plugin, go to the Edit tab.
In Bulk
You can also create copy components in bulk:
- In the web app, select multiple texts using the multi-select bar in your project.
- In the Figma plugin, use the Edit tab after selecting multiple texts.
If any of the selected texts have duplicates, they’ll automatically be included as instances in the newly created copy components.
.png)
Using the create or attach dropdown
In Figma
- Select a text element in Figma. If the text is not uploaded, read first on how to Upload content to Frontitude.
- Open the Edit tab in the plugin.
- Click Attach or create a component.
- A text box should appear. Here, you can search for an existing component or create a new one (see the recommended naming convention).
In web app
- Open a project in Frontitude.
- Select a text to open the editing panel.
- Click Attach or create a component.
- A text box should appear. Here, you can search for an existing component or create a new one (see the recommended naming convention).
Using suggestions
Frontitude runs a process that identifies text duplicates. If duplicates are found for the selected text, Frontitude will offer to create a copy component and attach all instances in a single action.
To get these suggestions:
In Figma
- Select a text element in Figma. If the text is not uploaded, read first on how to Upload content to Frontitude.
- Open the Edit tab in the plugin.
- See the suggestion right below the text box. If no suggestions found, it means that this text has no duplicates in Frontitude.
In web app
- Open a project in Frontitude.
- Select a text to open the editing panel.
- See the suggestion right below the text box. If no suggestions found, it means that this text has no duplicates in Frontitude.
What about components that have no reference in the design?
It is possible to create a component directly from the Copy Library for components that have no reference in the design, such as error messages, empty states, alt text, etc.
In web app
- Open your Copy Library.
- Click on New Component
- Fill in the following fields:
Text value - This one is the actual copy text.
Name (recommended) - The name of the newly created component. Although it is optional, we highly recommend giving the component a meaningful name, following our supported naming conventions. Properly naming your copy will help you organize it and make it easier to reuse in the design. - Click Create
- This component can now be reused in the design.
Auto-attach mechanism
Once a copy component is created, Frontitude automatically attaches identical texts moving forward. This ensures connectivity of your designs with your library without any hassle or manual work.
💡 Tip: Create copy components early to enable auto-attach. This ensures seamless connectivity between your designs and content, even when drastic design changes occur.
To disable the auto-attach feature, follow these steps:
- Open your workspace settings.
- Go to Data Management.
- Under Copy components, turn off the toggle switch labeled Automatically attach similar texts to existing components.
Detach text from a component
In case you want to detach a text from a component to stop sharing updates and other metadata with the rest of the instances, do the following:
In Figma
- Open the Edit tab in the plugin.
- Select a text element in Figma which is a copy component instance. You can identify connected instances by the purple background and the connected component displayed under the Copy component section.
- Under the Copy component section, click Detach.
- In the dialogue box, click Detach.
- Now on, this text will not get updates from the copy component, whether it’s value or metadata changes.
In web app
- Open a project in Frontitude.
- Select a text element in Figma which is a copy component instance. You can identify connected instances by the purple background and the connected component displayed under the Copy component section.
- Under the Copy component section, click Detach.
- In the dialogue box, click Detach.
- Now on, this text will not get updates from the copy component, whether it’s value or metadata changes.
Organize components
Frontitude allows you to organize your copy components intro a library, so you can have a clear view of your product copy. We work on enhanced organization features, but if you find a feature missing, please don’t hesitate to contact us!
Edit a component
Copy components allow you to set guidelines tags and unique key and automatically share them with attached text instances.
- Open the Library page on Frontitude.
- Select a copy component to edit.
- On the editing panel you’ll be able to add/remove tags, assign a unique key, and edit component guidelines. All these properties will be updated and displayed on all attached instances.
Delete a component
- Open the Library page on Frontitude.
- Select a copy component to delete.
- Click on the 3-dot menu, then click Delete.
View all component instances from the copy library
In Figma
- Open the Edit tab in the plugin.
- Select a text element in Figma which is a copy component instance. You can identify connected instances by the purple background and the connected component displayed under the Copy component section.
- Under the Copy component section, click on the copy component label.
- Your copy library will be opened in a new window, with the component displayed in the editing panel.
- Click on the instances count next to the component label, or expand the Instances section to view all attached instances.
In web app
- Open a project in Frontitude.
- Select a text element in Figma which is a copy component instance. You can identify connected instances by the purple background and the connected component displayed at the top of the panel.
- Click on the copy component label.
- Your copy library will be opened in a new window, with the component displayed in the editing panel.
- Click on the instances count next to the component label, or expand the Instances section to view all attached instances.
To learn how to build and maintain an organized Copy Library with all your copy components, read this guide.

