

With Frontitude's Figma plugin, you can sync content between Figma and your Frontitude workspace, ensuring that everyone stays on the same page—designers, writers, developers, and stakeholders.
By syncing Figma with Frontitude, you can:
- Avoid copy mismatches between designs and specs
- Collaborate seamlessly across teams
- Maintain a single source of truth for UX content
- Streamline localization workflows and handoffs to development
Whether you're updating content in Figma or reflecting changes from your content team, the two-way sync ensures smooth collaboration throughout the design process.

Syncing from Frontitude to Figma
Once content is stored and edited in Frontitude, you can sync it back into the Figma designs to reflect the latest updates.
How to do it:
- Open the Figma plugin. Launch the Frontitude plugin from the Figma design file you want to update.
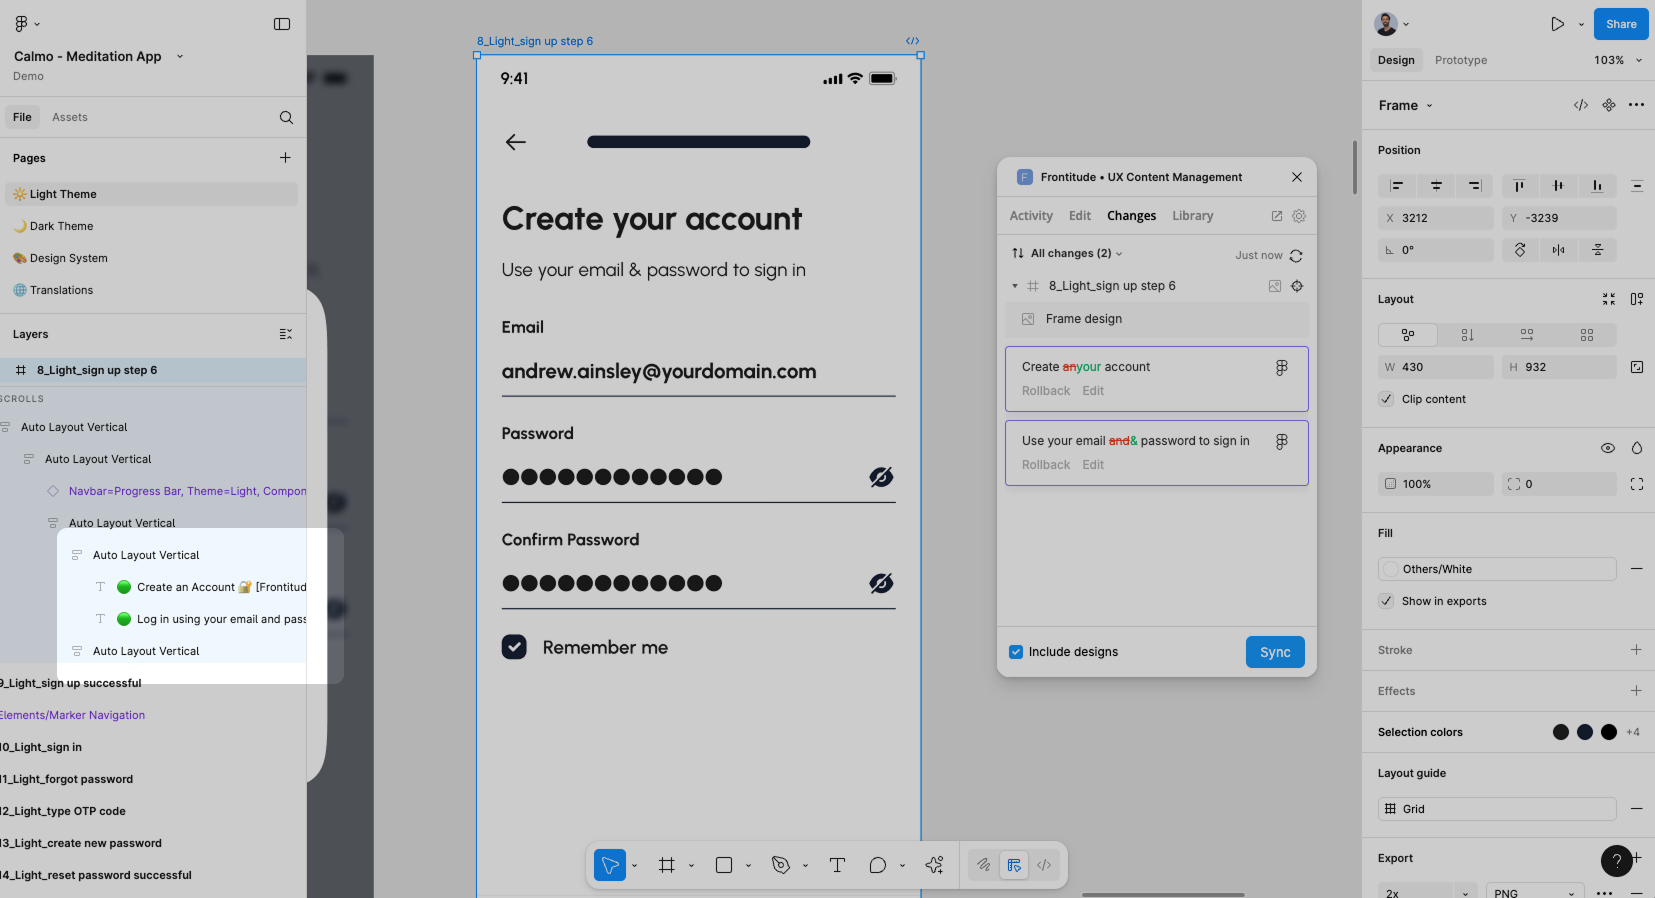
- Navigate to the Changes tab. Go to the Changes tab to see a list of all frames and layers that are currently linked to Frontitude.
- Select frames to apply. Frontitude shows any changes made to the content inside your selected frames in Figma (or the entire file if selection is empty).
- Sync to apply updates to Figma. Once selected, click Sync and Frontitude will update the relevant text layers inside the Figma file.
Tip: All updates preserve the original text styles and auto layout settings.
Syncing from Figma to Frontitude
When new copy is written or edited inside Figma, Frontitude allows you to push those changes to the workspace to keep the content repository up to date.
How to do it:
- Open the plugin and navigate to Changes. Open the Frontitude plugin in your design file and head to the Changes tab.
- View unsynced Figma changes. Frontitude detects copy edits made directly in the Figma file since the last sync. Refresh the tab to get the latest changes.
- Choose what to sync. Select the text layers or frames you want to update in Frontitude, or clear selection in Figma to sync all at once.
- Push changes to Frontitude. Click Sync and the selected changes will be reflected in your Frontitude workspace for collaboration, review, and future localization.
What Data Is Synced
When syncing content between Figma and Frontitude, more than just the text is transferred. Key metadata is also exchanged to ensure complete context and traceability:
- Content keys: If a unique key is assigned to a text node, it is synced and maintained for development and localization workflows.
- Status: The content status from Frontitude (such as Draft, Review, Final) is visible in the plugin and in Figma's layer menu.
- Contextual data: Any design context that helps inform the writing process is preserved through the sync.
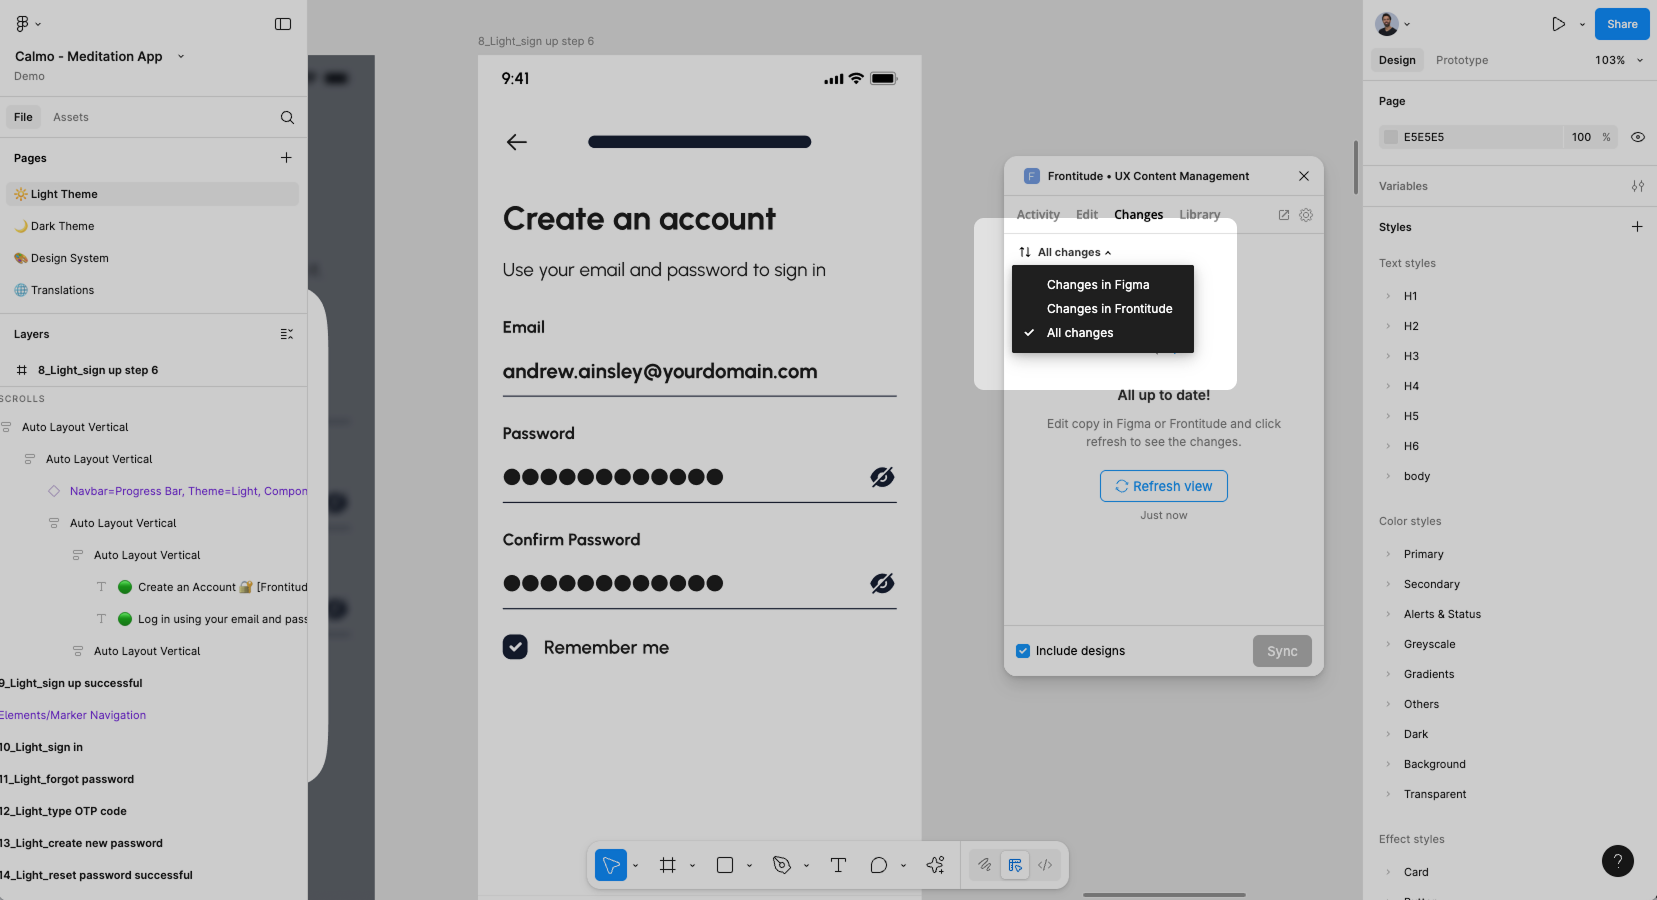
Sync Directions Explained
The Changes tab offers a flexible, two-way sync that supports the following flows:
- All changes (default): Detect and apply all relevant changes in both directions to ensure full consistency between the design file and the content workspace.
- Changes in Figma: Capture edits made directly inside the Figma file and push them into Frontitude for collaboration, review, and localization.
- Changes in Frontitude: Reflect changes made by writers or stakeholders in the Frontitude workspace back into the Figma designs with a single click.
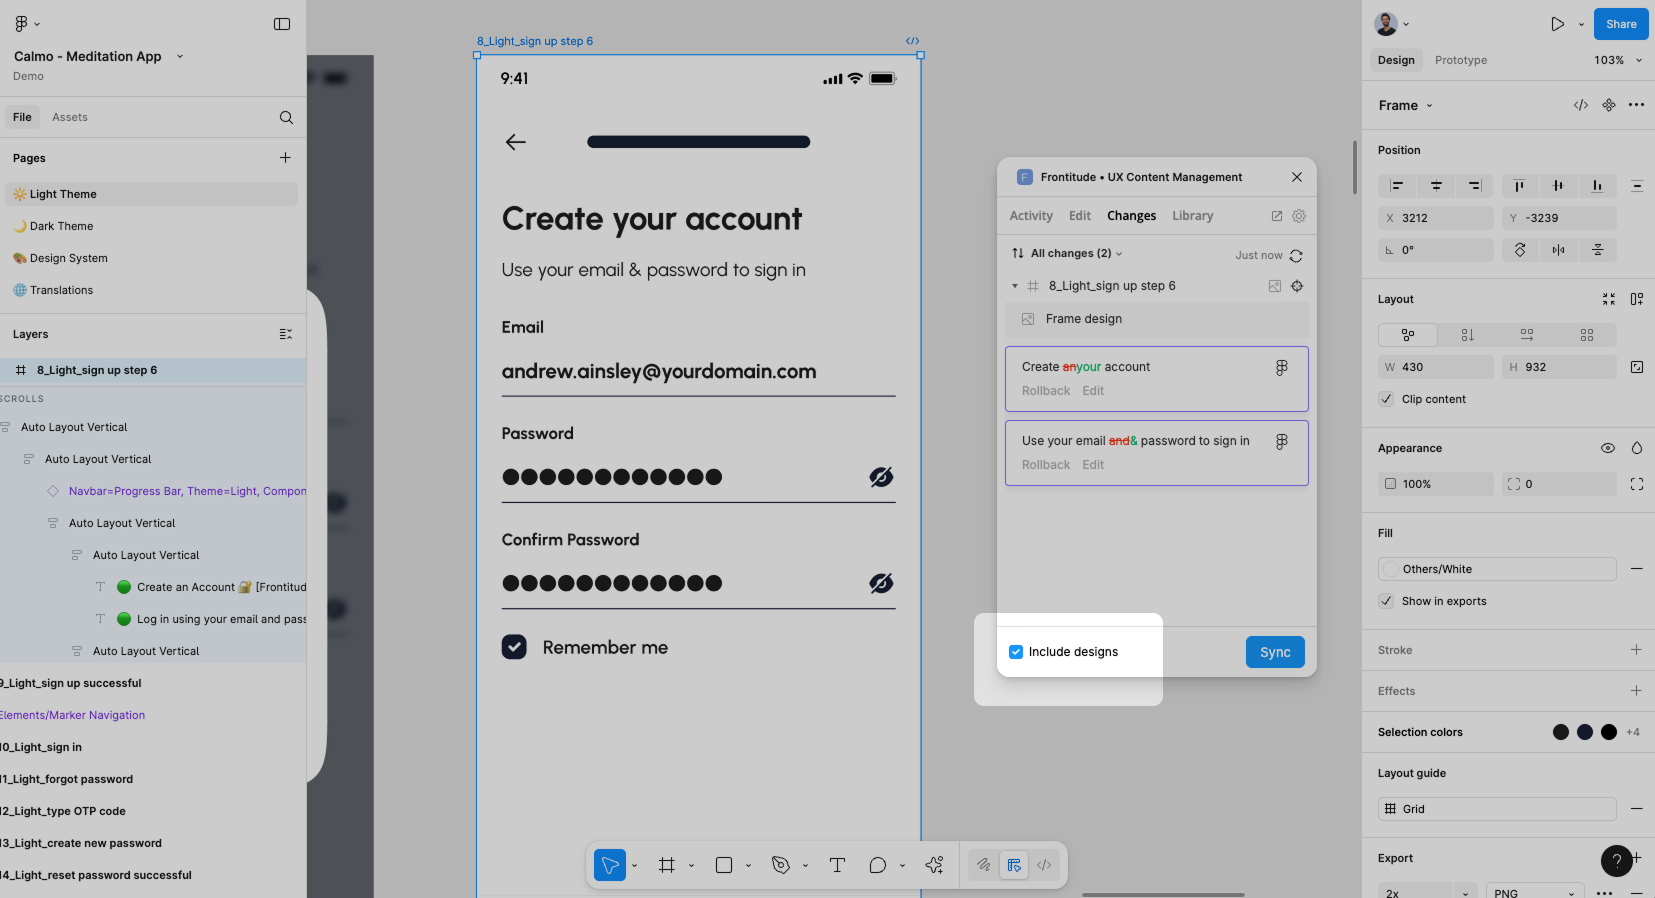
The Include Design Option
When syncing changes from Figma to Frontitude, you will see a checkbox labeled Include designs in the Changes tab. This determines whether to include visual context such as screenshots of frames or nodes as part of the sync.
Turning this on gives reviewers, content designers, and translators additional clarity when working with copy in Frontitude. If you do not need visual references, you can leave this option unchecked to speed up the sync.
Sync Without Auto-Attach
You can also disable auto-attach globally for your entire workspace in Settings → Copy Library.

