You can use Frontitude on your own to store all your copy in one place (free forever), but you'll reap the real benefits of Frontitude when your whole team uses it to collaborate on your product's copy.
In this article, you'll learn how to add team members as collaborators to your workspace. To learn more about the roles and permissions available in Frontitude, visit Roles and permissions.
View workspace collaborators
- Click Settings under your user-avatar dropdown menu.
- Click the Account tab.
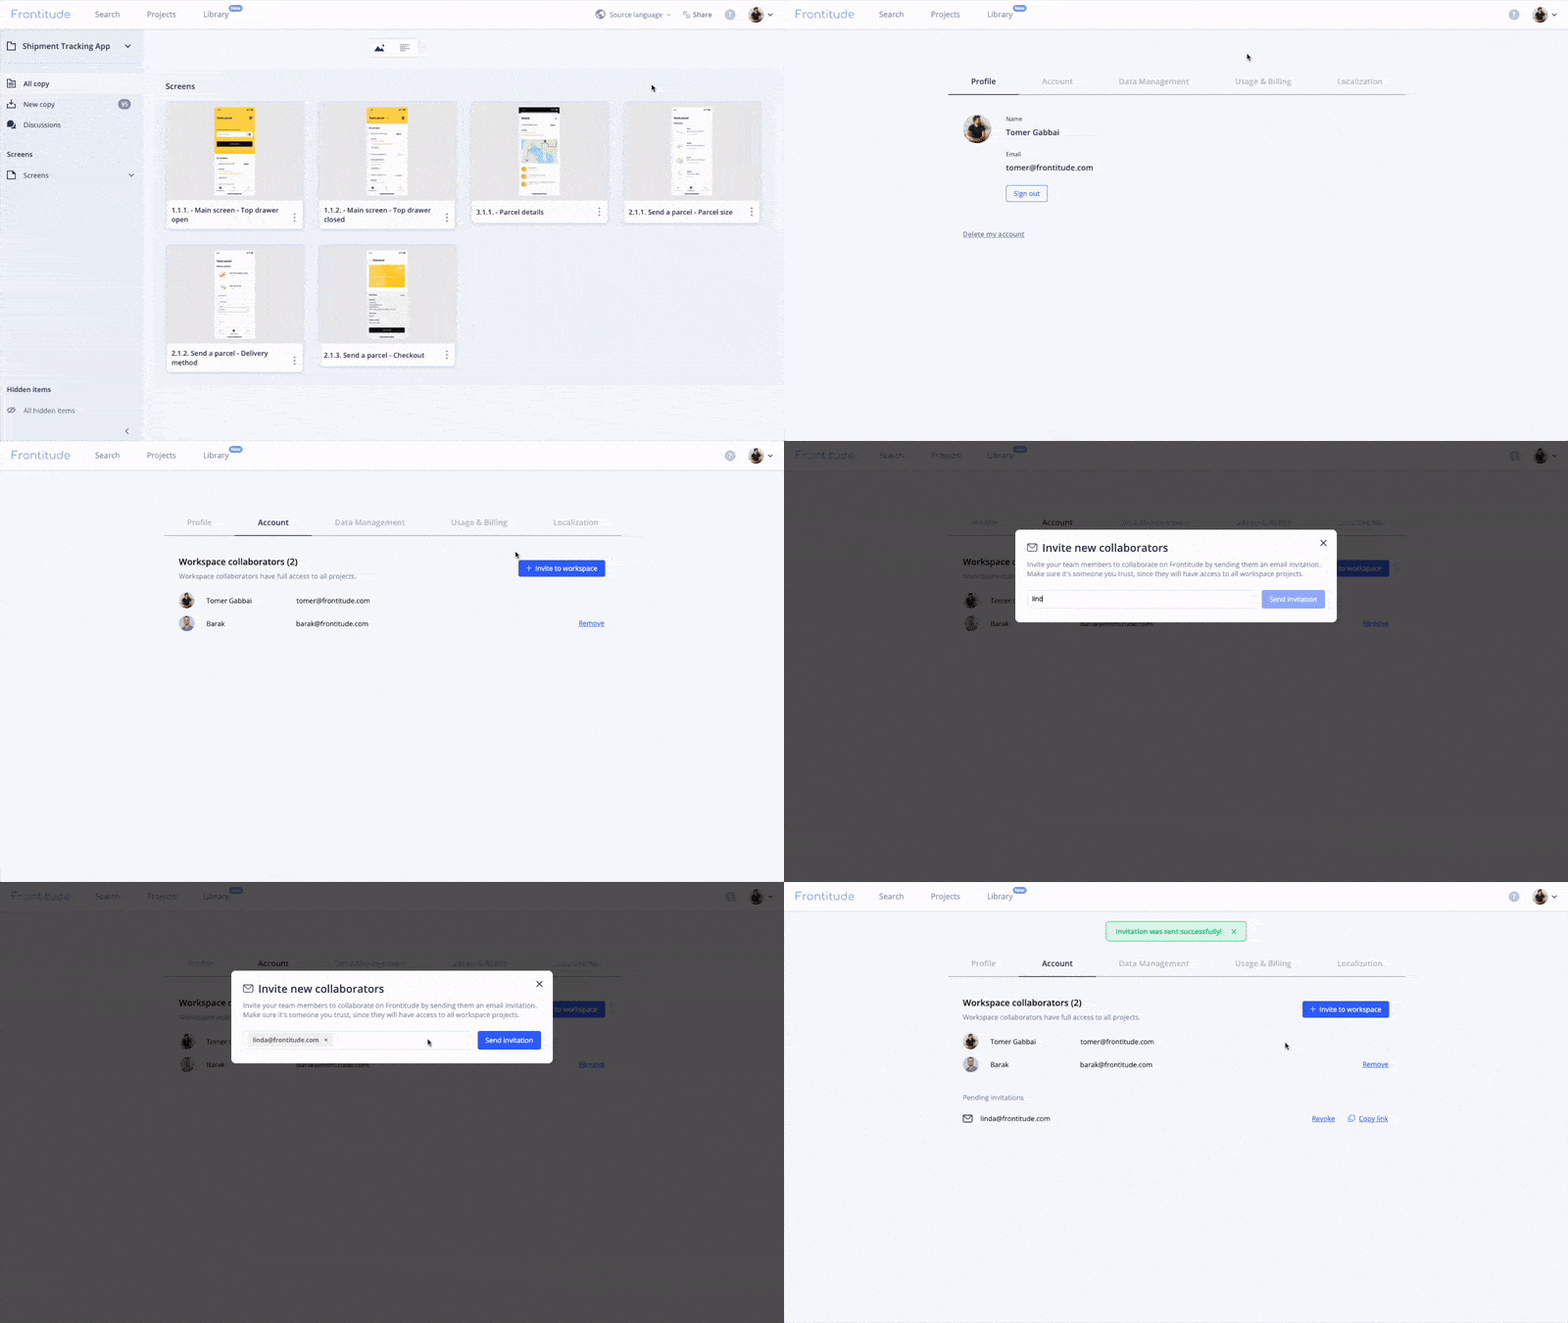
- You'll see a list of all existing collaborators and their roles, as well as pending invitations. You can also remove them.
Invite team members to join your workspace
- On the Settings page, under the Account tab, enter the emails of the team members you'd like to add.
- Click Send Invitation. Since the invitation gives the user access to all your data in your Frontitude workspace, be sure you send it to the right email addresses.
💡 Workspace invitations are one-time and cannot be reused. Currently, Frontitude supports a single workspace per user, so once a user uses an invite, they won't have access to the workspace they were previously part of.
To cancel an invitation and revoke access, click the Revoke button next to the invitation, in the Pending Invitations list.
Instead of sending the invitation directly through Frontitude, you can copy the invitation's link and send it via any other channel (like Slack or WhatsApp). Click Copy invitation link next to the invitation under the Pending Invitations list and paste it wherever you'd like.
Invite collaborators to join specific projects
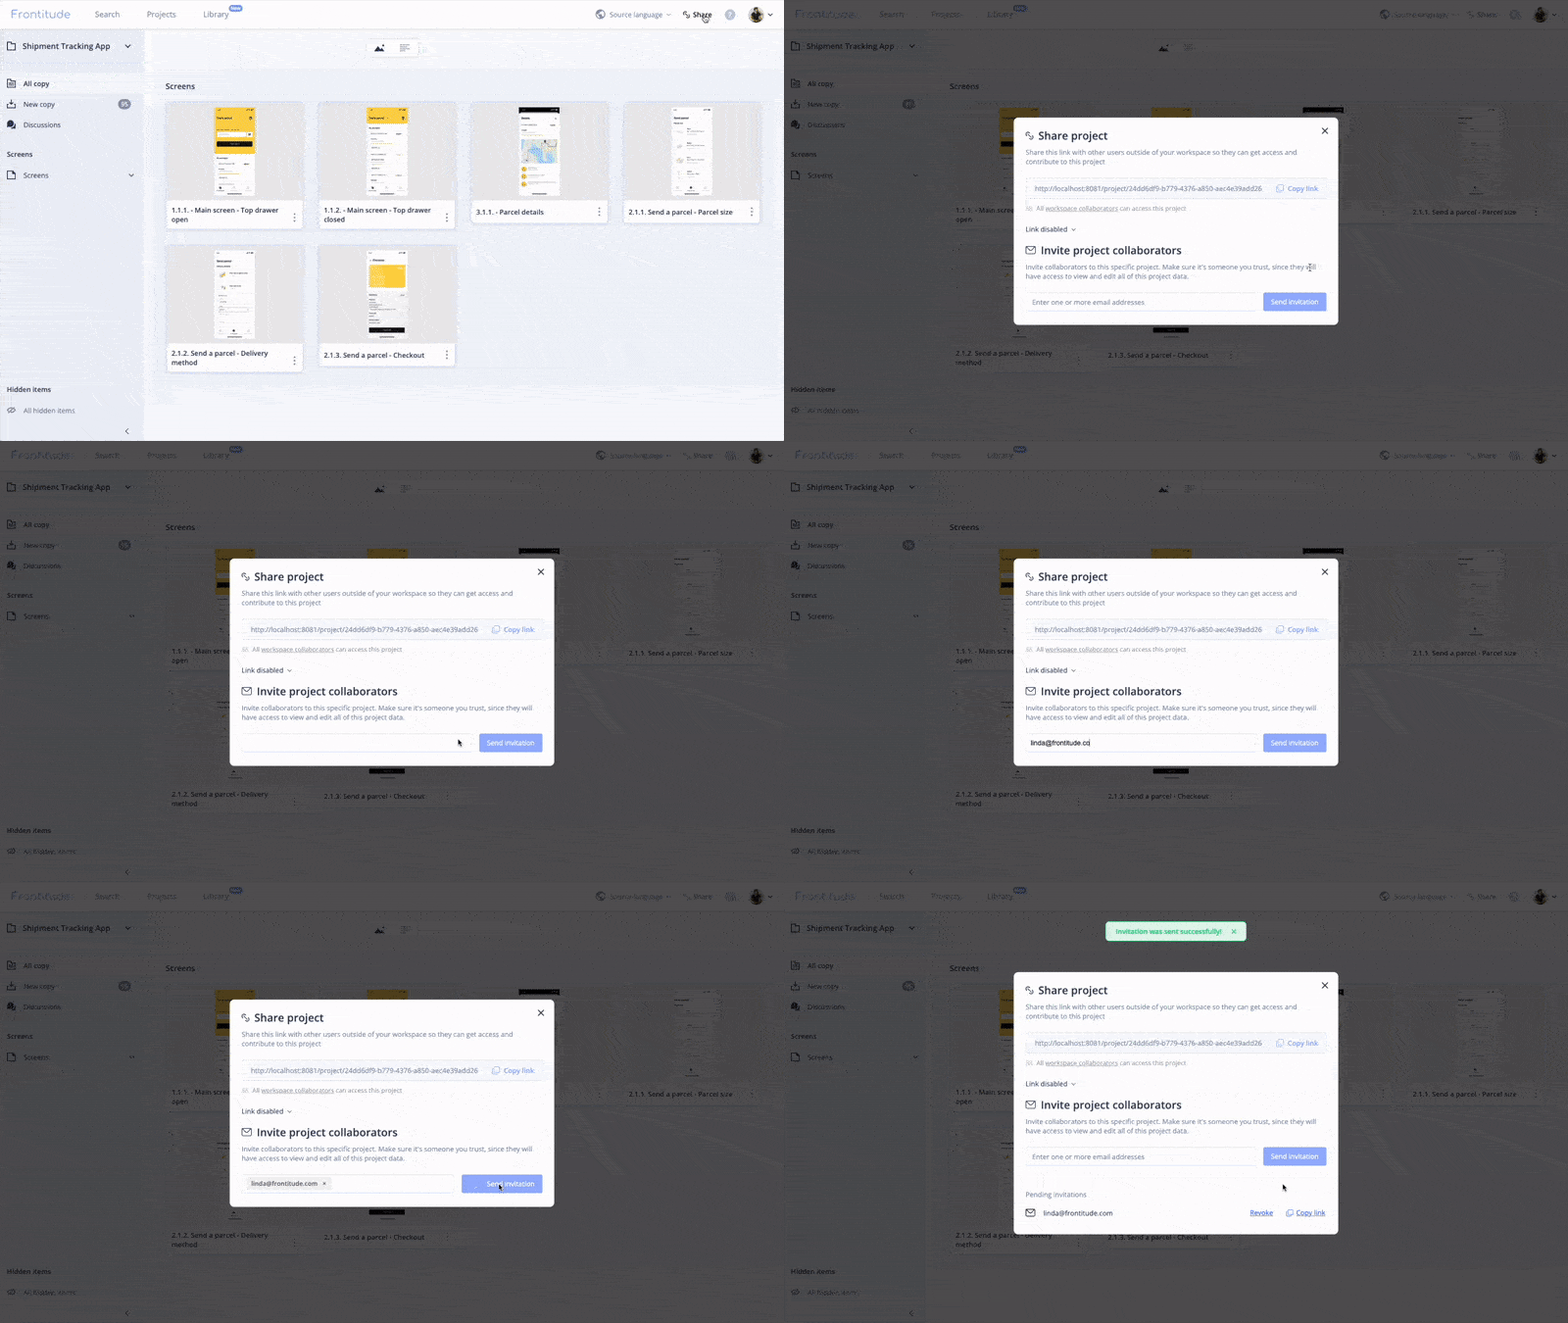
If you'd like to collaborate with an external team or stakeholder but don't want them to have access to your whole workspace, you can add them to specific projects. Check out our Shareable links feature to learn more about this.
Invite collaborators to an entire folder
If you manage external clients, agencies, or contractors in Frontitude, you've had to invite them project by project — even when all those projects live in the same folder.
You can now invite a collaborator directly from a folder's options menu. They'll automatically get access to every project inside it, including any projects added to that folder in the future.
How to invite a collaborator to a folder
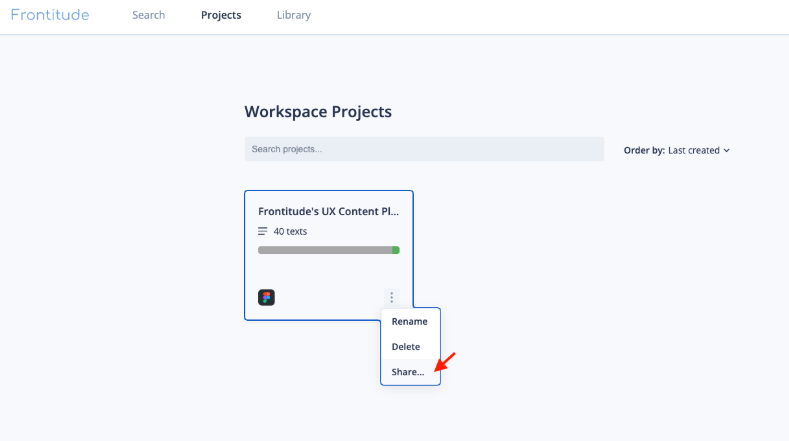
- Go to your project list and find the folder you want to share.
- Click the "..." menu on the folder card.
- Select Share…
- Enter one or more email addresses.
- Choose a role — Editor or Viewer.
- Click Invite.
The invitee receives an email invitation. Once accepted, they'll have access to all current projects in that folder.
What happens after inviting
- New projects are covered automatically. If you add a project to the folder after sending the invite, the collaborator gets access without any extra steps.
- Access revokes on move. If a project is moved out of the folder, the collaborator immediately loses access to it. Their access to other projects in the folder is unaffected.
- Higher privilege always wins. If a collaborator has both a folder-level and a project-level grant for the same project, the higher role (Editor over Viewer) applies.
Managing folder-level collaborators
You can view and manage folder-level access in two places:
- From the folder: Open the "..." menu → Share… — the dialog lists all current collaborators and lets you change their role or remove them.
- From Settings: Go to Settings → Account — a dedicated section shows all Project Folder Editors and Project Folder Viewers across your workspace, including which folders they have access to.
💡 Folder-level collaborators can see only the folders and projects they've been invited to — nothing else in your workspace is visible to them. They cannot rename or delete folders or projects.