💡 The best way to upload content to Frontitude is by using the design tool plugin, since it includes the full design context. You can also import content from a file or create it directly from the copy library.
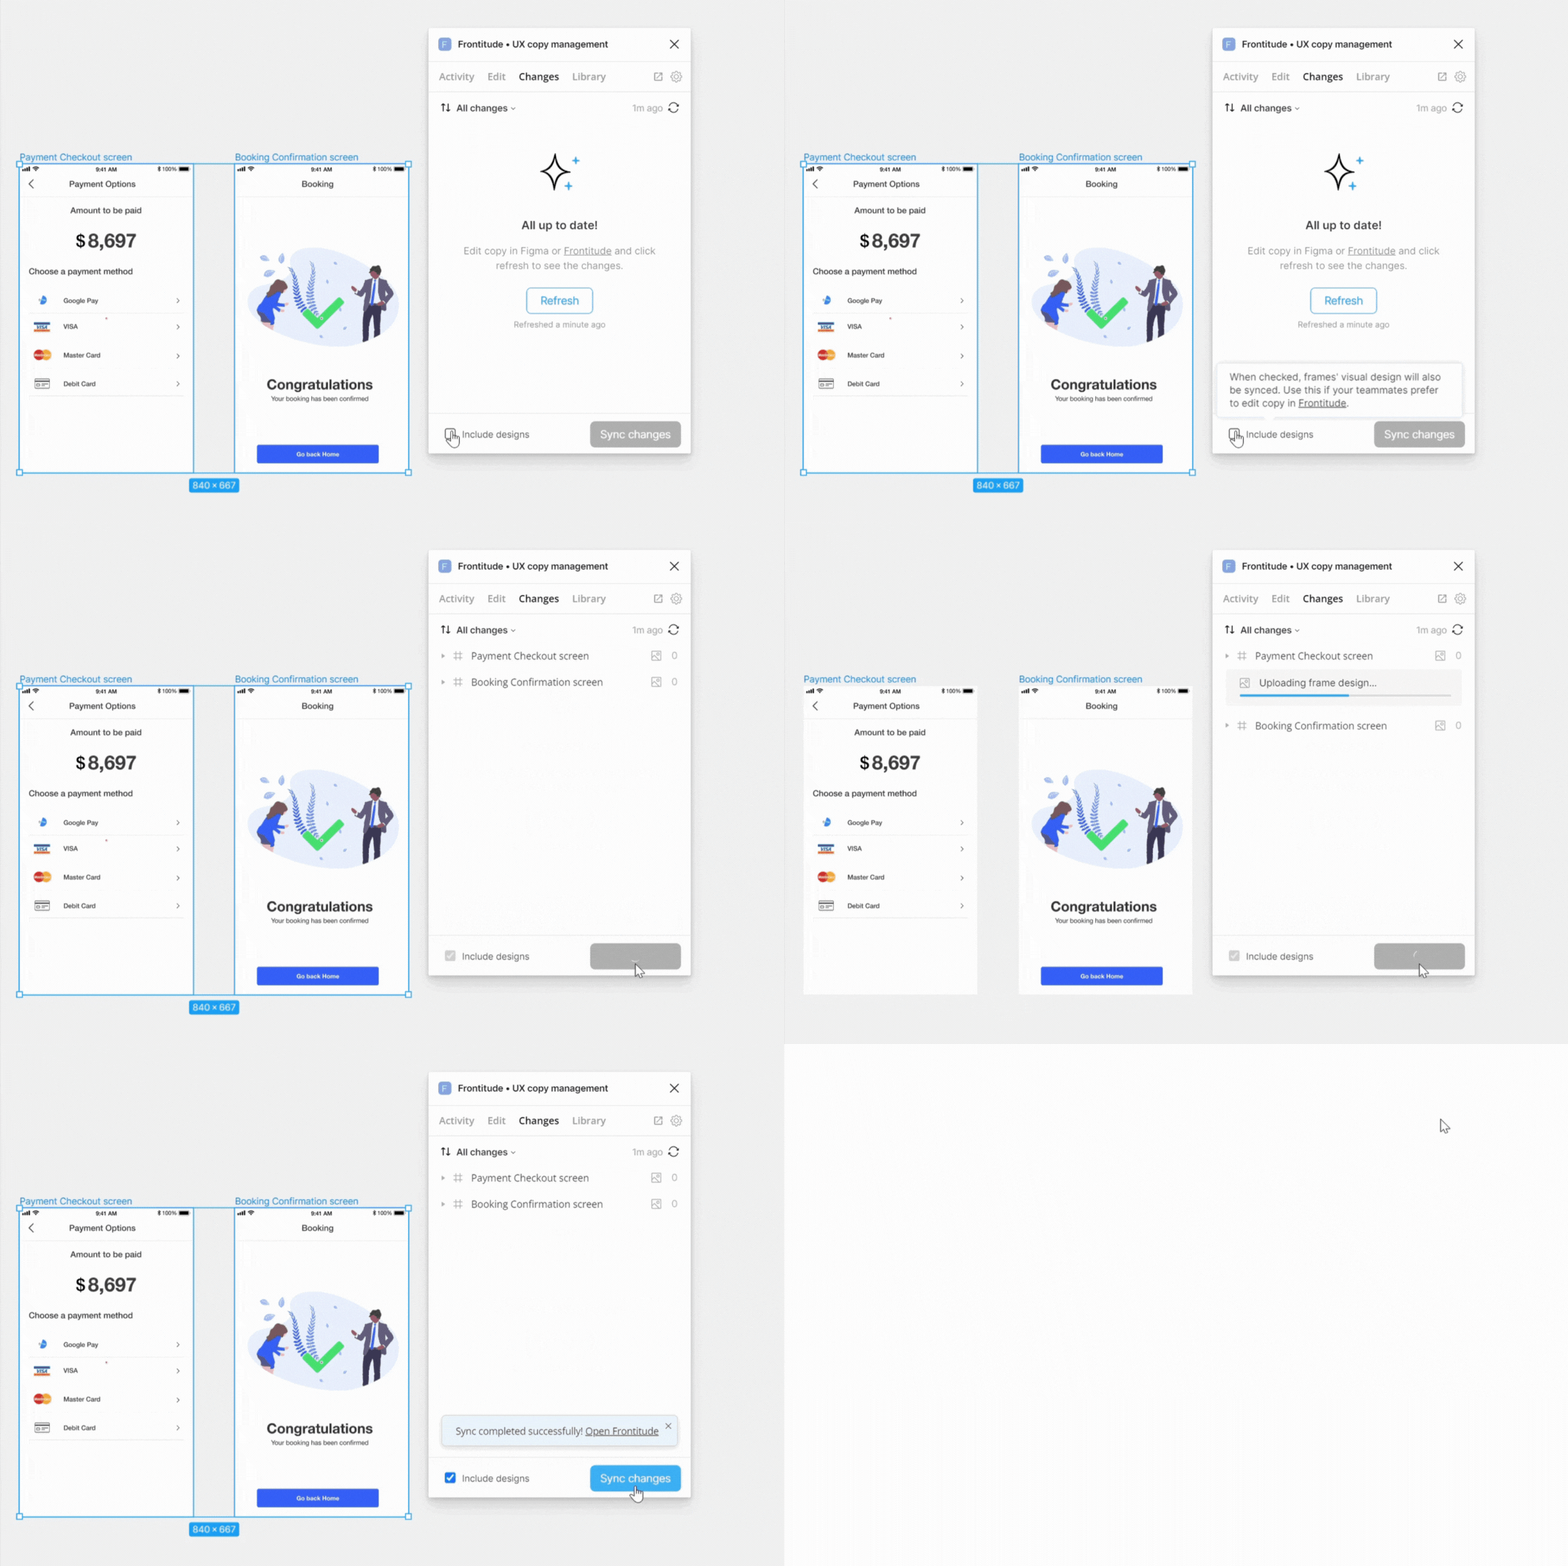
If you’ve already uploaded some frames from the current Figma file, open the Changes tab. (If it's the first time, go to Create a new project) Then:
- Select the frames you'd like to upload.
- Check Include design checkbox if you'd like to upload the visual design as well. The upload process will take a bit longer, but you’ll be able to see the copy on the design in Frontitude's web application.
- Click the Sync button.
- Click the Open in Frontitude icon at the top-left corner of the plugin to view the uploaded content in your Frontitude project.

Auto-attach to copy components
You can deactivate auto-attach from your data management settings, by turning off Automatically attach similar texts to existing components
Frontitude activates a matching algorithm when you upload new texts from the design tool.
As part of uploading texts, Frontitude automatically attaches copy components with identical values to chosen components.
When there are multiple components with the same value, Frontitude prioritizes them by the following order:
- Categorized components
- Components with a unique key assigned
- Components with higher amount of attached instances
- Components with advanced status (Final > In Review, etc.)


