

Runtime variables let you write a single piece of copy in your library that dynamically adapts at runtime — while still giving writers and developers a clear, human-readable preview.
Before diving in, here's how the two key terms are used throughout this guide:
- Variable — a named token (e.g.
{{assignee}}) that marks the spot where a dynamic value will be injected at runtime. A variable is defined once at the workspace level and can appear in any number of library components. - Placeholder — a human-readable preview value for a variable (e.g. "Alice" for
{{assignee}}). Placeholders are what writers and reviewers see in Frontitude; they are never shipped to production. You can define multiple placeholders per variable to represent realistic scenarios.
With runtime variables you can:
- Keep library components generic and reusable while seeing realistic previews
- Let writers choose the right placeholder for each instance, without touching code
- Ship content-development-ready strings from the library to your codebase — variables included
Who is this for?
Content designers and UX writers — configure variables, write component templates, and choose per-instance placeholder values for review.
Developers — get variable-annotated strings in every export and via the CLI, matching exactly what engineering expects at runtime.
1. Set up workspace variables
Workspace variables are managed by an editor in your workspace settings. Each variable has a name (the token used in copy) and a list of placeholder values for preview purposes.
- Go to Settings → Data Management.
- Scroll to the Workspace variables section.
- Click New variable.
- Type the variable name (e.g.
assignee) and press Enter. - Add placeholder values one by one — type each value and press Enter to confirm (e.g. Alice, Bob, Charlie).
- Repeat for each variable your product needs (e.g.
action,status,taskName).

💡 Variable names are case-sensitive and must match exactly what your engineering team uses at runtime. Agree on a naming convention (e.g. camelCase) with your developers before setting up variables.
2. Use variables in library components
Once variables are defined, writers can insert them directly into a library component's text using the Insert a variable button in the text edit box.
- Open the Library and navigate to the relevant component (or create a new one).
- In the component's text edit box, place your cursor where the variable should appear.
- Click + Insert a variable at the bottom of the text box.
- Select the variable you want to insert from the list.
- Frontitude inserts a coloured variable chip at the cursor position, showing the first placeholder value as a preview.
- Continue writing the surrounding copy as normal, then save the component.
💡 Variable chips are a preview aid only — the string stored and exported always uses the raw {variableName} token. Your developers receive exactly what their code expects.
3. How auto-attach works
When a project text matches a component template (treating each {variable} as a wildcard), Frontitude automatically links — or attaches — the project instance to that library component. No manual linking is required.
For example, if your library has a component with the text {assignee} marked {task} as complete, then any project text like Alice marked Onboarding as complete or Bob marked Bug fix as complete will be auto-attached to that component.
Once attached, the project instance text displays the variable chips with the matched placeholder values, so writers always see a realistic, context-aware preview.
💡 Auto-attach runs whenever a project is synced from Figma, or when a component is updated in the library. If a match is found, the attachment happens silently in the background — no action required.
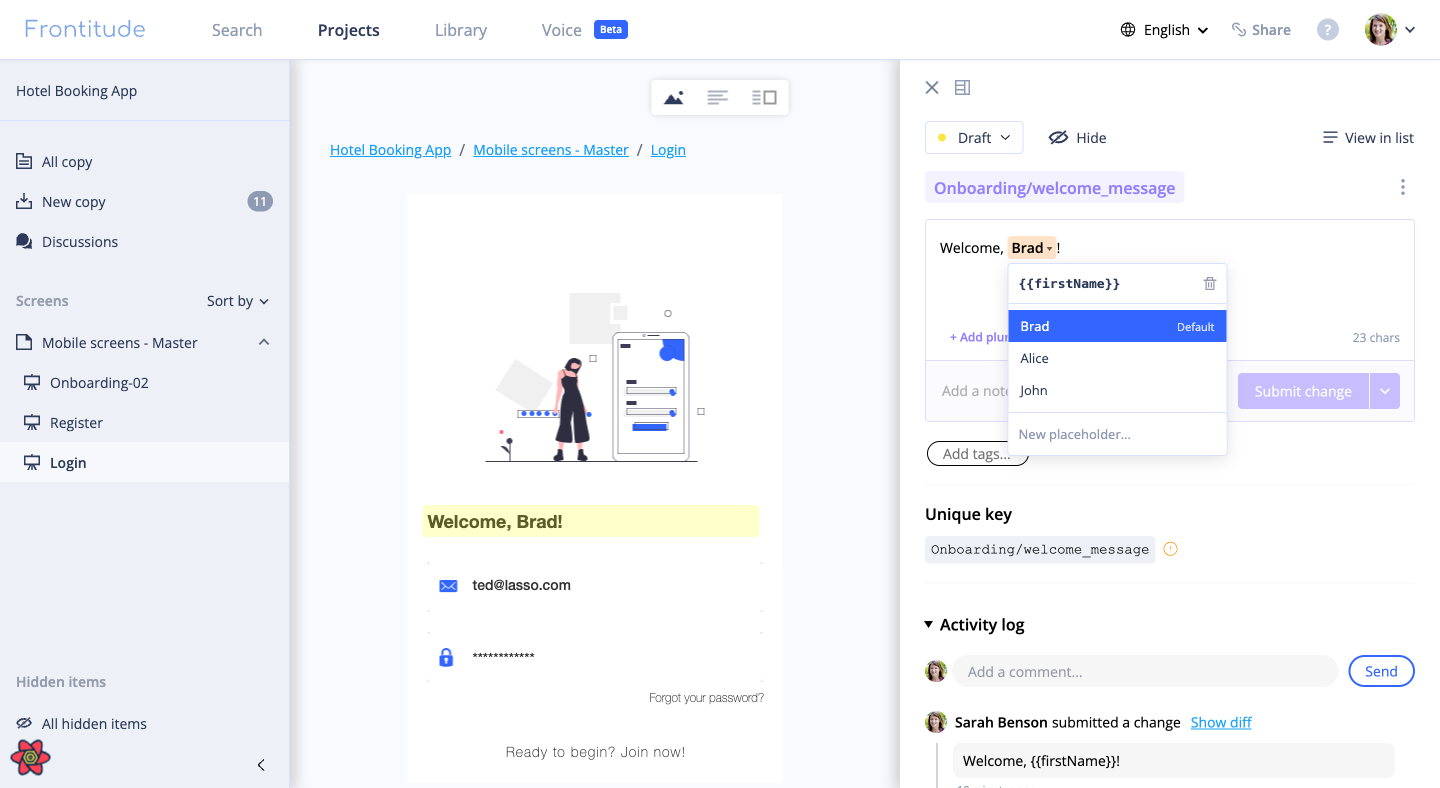
4. Override placeholder values per instance
The default placeholder for each variable comes from the component definition. You can override it for any specific project instance — useful when the instance's context calls for a different preview value (for example, a screen targeting a specific user persona).
- In the project, click on the text to open the Edit Side Panel.
- The text displays its variable chips (e.g. Alice, Completed).
- Click the chip you want to change.
- A dropdown shows all available placeholder values for that variable.
- Select the new value — only this instance is affected. All other instances keep their own placeholder.
💡 Instance placeholder overrides are preserved through re-syncs from Figma. If a placeholder value in Settings is renamed, all instances using that value update automatically.
Placeholders and plural forms
If your component uses plural forms (e.g. "1 item" vs. "3 items"), you can set a different placeholder value for each plural form independently. This lets you preview how each plural variant reads with the most realistic value — for example, using "1" as the placeholder for the singular form and "5" for the plural form of a {count} variable.
To set per-plural placeholders:
- Open the instance text in the Edit Side Panel.
- Switch between plural forms using the plural tabs above the text box.
- For each form, click the variable chip and select the appropriate placeholder.
Placeholders and target languages
When working with localised content, you can set a different placeholder value per target language for each variable. This is particularly useful when placeholder values are locale-specific (for example, a name that should appear in its localised form, or a status value translated to the target language).
To set per-language placeholders:
- Switch the workspace language to the target locale using the language selector in the top bar.
- Open the instance text in that locale's view.
- Click the variable chip and choose the appropriate placeholder for this language.
5. Variables in exports and the CLI
Runtime variables are fully supported in Frontitude's export and developer handoff workflows.
Exporting to a file:
- Click Export from any project or the Copy Library.
- The exported file includes the raw variable syntax (
{variableName}) alongside the current placeholder value as a preview hint. - Developers can use the variable token directly in their i18n or string interpolation logic — no manual extraction needed.
Developer CLI:
- The Developer CLI knows how to convert the variable syntax to each repository based on the target file format. See supported file formats here.
6. Figma plugin support
Variable chips are visible directly in the Frontitude Figma plugin's text view. Writers can see and change the per-instance placeholder from Figma without switching to the web app — handy when reviewing a design in context.
FAQ
What happens if I use a variable name that isn't defined in Workspace Variables?
If the {variableName} in your component text doesn't match any variable defined in Settings, Frontitude treats it as plain text and won't render a chip. Make sure variable names match exactly (including case).
Can I have multiple variables in a single string?
Yes. You can include as many variables as needed in one string — for example, {assignee} moved {task} to {status}. Each variable is independent and has its own chip and placeholder list.
What if a placeholder value is deleted from Settings?
If a placeholder value that's in use by one or more instances is deleted, Frontitude shows a conflict error before allowing the deletion. Resolve the affected instances first to maintain content integrity.
Can I rename a variable after it's been used in components?
Renaming a variable in Settings updates the variable definition, and updates the relevant components automatically. Note that this will create another revision that should be synced with developers.
Are variables included in content reviews?
Yes. When you send a text to review, the reviewer sees the variable chips with their current placeholder values — giving reviewers the same realistic preview that writers see.

